プライベート接続なしで、インベントリ収集設定 ~Azure編~
こんにちは、本サイトを見てくださりありがとうございます!
この記事ではIIJ統合運用管理サービス(UOM)構成管理のインターネット経由でのインベントリ収集方法について紹介したいと思います。今回はAzure編です。よろしくお願いします!
目次
構成管理 インベントリ収集について
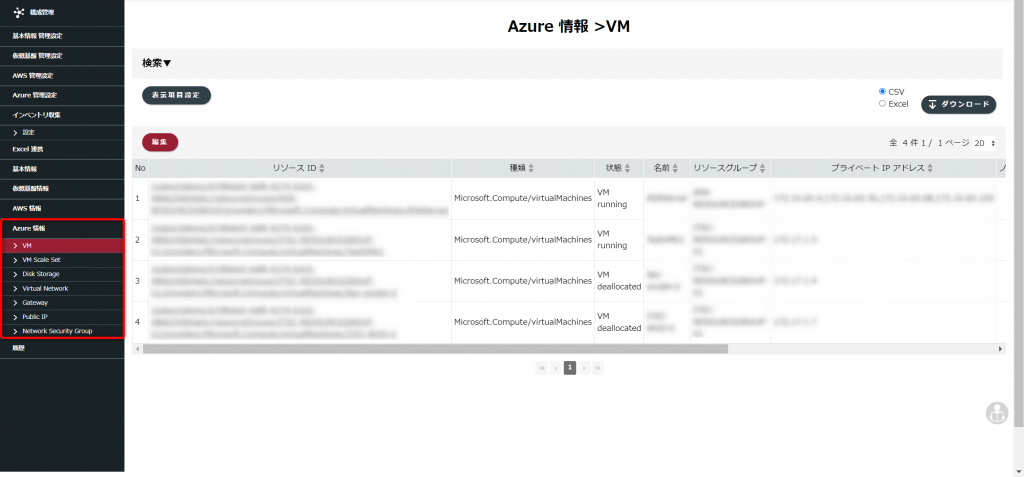
UOMの構成管理機能でインベントリ収集を行う場合、収集機器とプライベート接続が確立している必要がありますが、AWS・Azureはインターネット経由での情報収集が可能です。Azureの場合、インターネット経由ではVM・VMScaleSet・DiskStorage・VirtualNetwork・Gateway・PublicIP・NetworkSecurityGroupについての情報を取得できます。その他のノード、ソフトウェア情報を取得するにはプライベート接続が必要になります。
今回はインターネット経由でAzureのインベントリ収集を行う方法を紹介していきます!
インターネット経由でのインベントリ収集設定方法 ~Azure編~
インターネット経由でインベントリ収集を実施するには、UOMに管理対象のAzureアカウントを登録する必要があります。アカウントの登録には、サービスプリンシパルを利用します。
サービスプリンシパルの取得はAzure CLIで行うのですが、今回はWindows PowerShellを利用して作成、確認してみます。
Azure CLIのインストールがまだの方は、以下ページを参照にインストールしてみてください。
Azure CLI をインストールする方法
Azure CLIでサインインする
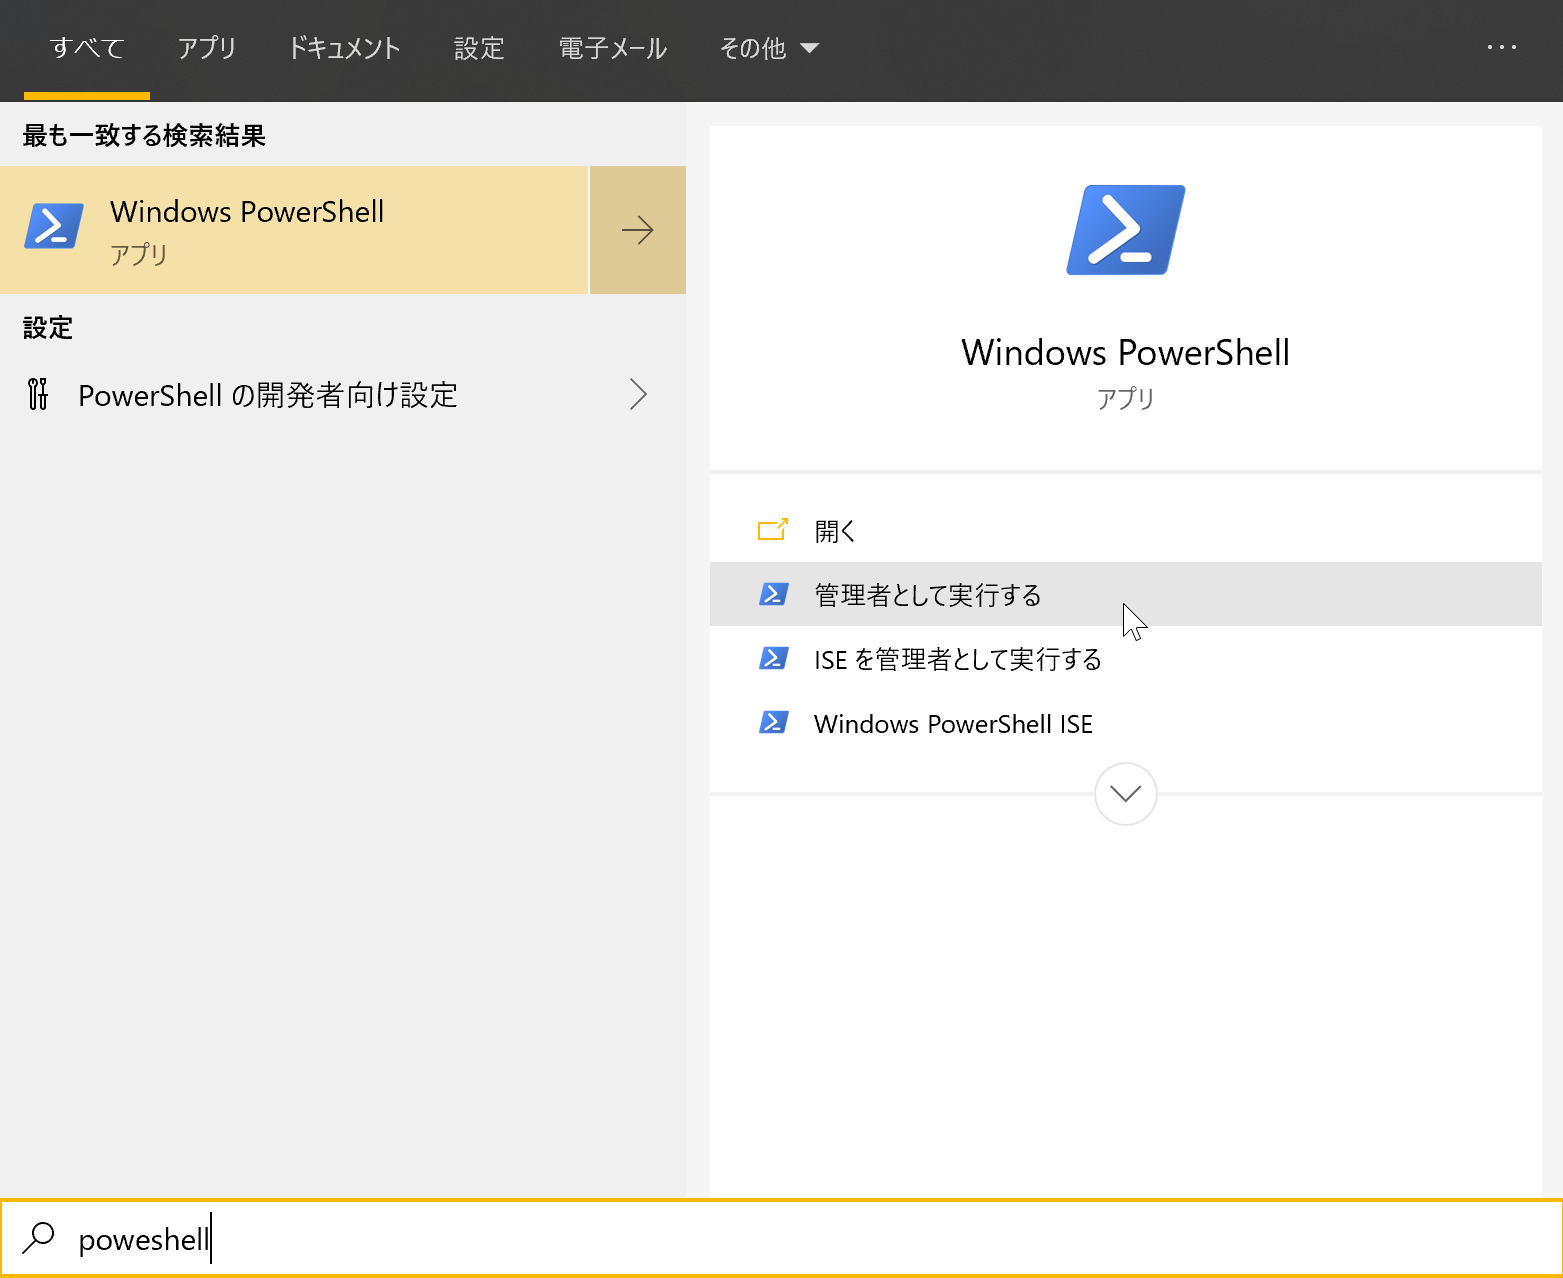
検索バーに「powershell」と入力し、Windows Power Shellを起動します。
「az」コマンドでAzure CLIを実行します。
C:\Users\iijuser> az

     /\
    /  \    _____   _ _  ___ _
   / /\ \  |_  / | | | \'__/ _\
  / ____ \  / /| |_| | | |  __/
 /_/    \_\/___|\__,_|_|  \___|


Welcome to the cool new Azure CLI!
「az login」コマンドでお使いのAzureにサインインします。
規定のブラウザーが開き、自動でサインインページが読み込まれて以下のとおりサインインできます。
C:\Users\iijuser> az login
A web browser has been opened at https://login.microsoftonline.com/organizations/oauth2/v2.0/authorize. Please continue the login in the web browser. If no web browser is available or if the web browser fails to open, use device code flow with `az login --use-device-code`.
[
  {
    "cloudName": "AzureCloud",
    "homeTenantId": "xxxxxxxxxxxxxxxxxxxxxxxxxxx",
    "id": "xxxxxxxxxxxxxxxxxxxxxxxxxxxxxxxxx",
    "isDefault": true,
    "managedByTenants": [],
    "name": "Azure",
    "state": "Enabled",
    "tenantId": "xxxxxxxxxxxxxxxxxxxx",
    "user": {
      "name": "iijtest",
      "type": "user"
    }
  }
]
サービスプリンシパルを作成する
「az ad sp create-for-rbac」コマンドで、サービスプリンシパルを作成します。displayNameは任意のものを指定してください。
C:\Users\iijuser> az ad sp create-for-rbac -n {displayName}
The output includes credentials that you must protect. Be sure that you do not include these credentials in your code or check the credentials into your source control. For more information, see https://aka.ms/azadsp-cli
{
  "appId": "xxxxxxxxxxxxxxxxxxxxxxxxxx",
  "displayName": "xxxxxx",
  "password": "xxxxxxxxxxxxxxxxxxxxxxxxxxx",
  "tenant": "xxxxxxxxxxxxxxxxxxxxxxxxxx"
}
サービスプリンシパルが作成できました!これらの情報はAzureアカウント設定で使用するので、必ず保存しておいてください。
作成したサービスプリンシパルを確認してみましょう。確認には、「az ad sp list」コマンドを使用します。
C:\Users\iijuser> az ad sp list --display-name {displayName}
[
  {
    "accountEnabled": true,
    "addIns": [],
    "alternativeNames": [],
    "appDescription": null,
    "appDisplayName": "xxxxxxxxxxxxxxxxxxxxxxx",
    "appId": "xxxxxxxxxxxxxxxxxxxxxxx",
    "appOwnerOrganizationId": "xxxxxxxxxxxxxxxxxxxxxxx",
    "appRoleAssignmentRequired": false,
    "appRoles": [],
    "applicationTemplateId": null,
    "createdDateTime": "2022-07-14T04:51:12Z",
    "deletedDateTime": null,
    "description": null,
    "disabledByMicrosoftStatus": null,
    "displayName": "xxxxxxxxxxxxxxxxxxxxxxx",
    "homepage": null,
    "id": "xxxxxxxxxxxxxxxxxxxxxxx",
    "info": {
      "logoUrl": null,
      "marketingUrl": null,
      "privacyStatementUrl": null,
      "supportUrl": null,
      "termsOfServiceUrl": null
    },
    "keyCredentials": [],
    "loginUrl": null,
    "logoutUrl": null,
    "notes": null,
    "notificationEmailAddresses": [],
    "oauth2PermissionScopes": [],
    "passwordCredentials": [],
    "preferredSingleSignOnMode": null,
    "preferredTokenSigningKeyThumbprint": null,
    "replyUrls": [],
    "resourceSpecificApplicationPermissions": [],
    "samlSingleSignOnSettings": null,
    "servicePrincipalNames": [
      "xxxxxxxxxxxxxxxxxxxxxxx"
    ],
    "servicePrincipalType": "Application",
    "signInAudience": "AzureADandPersonalMicrosoftAccount",
    "tags": [],
    "tokenEncryptionKeyId": null,
    "verifiedPublisher": {
      "addedDateTime": null,
      "displayName": null,
      "verifiedPublisherId": null
    }
  }
]
ここでは –display-name で参照対象を指定しましたが、規定コマンドのままだと、テナントの最初の100個のサービスプリンシパルが表示されます。テナントのサービスプリンシパルすべてを取得するには –all パラメータを使用すると取得できますよ(時間がかかる場合がありますので、注意してください)。
構成管理機能と連携する
Azureアカウント設定のための情報が確認できたので、早速UOMに登録していきましょう。
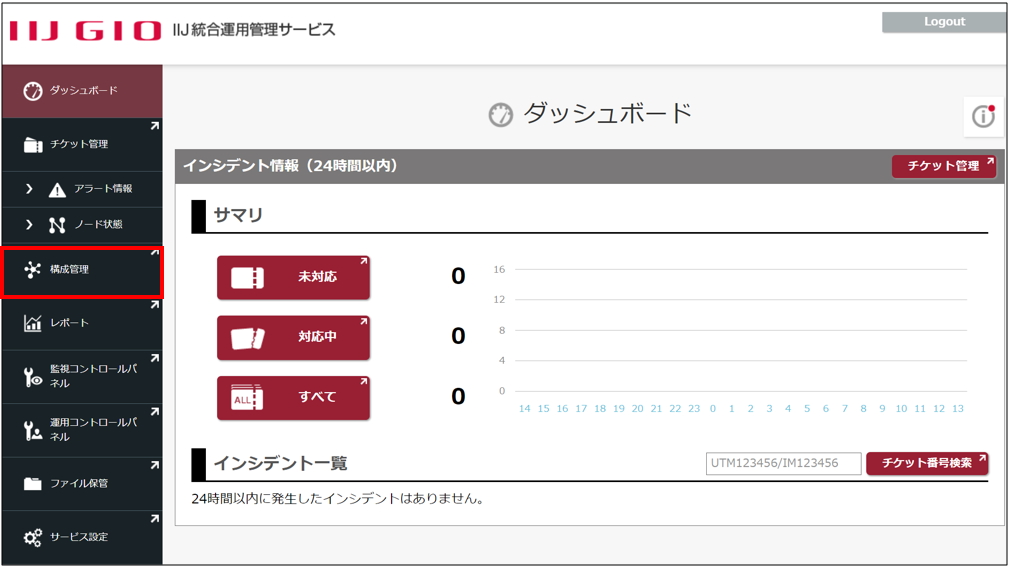
UOMにログインし、TOP画面の左メニューから構成管理のダッシュボードを開きます。
構成管理の左メニューから、Azure管理設定>Azureアカウント設定 を開きます。
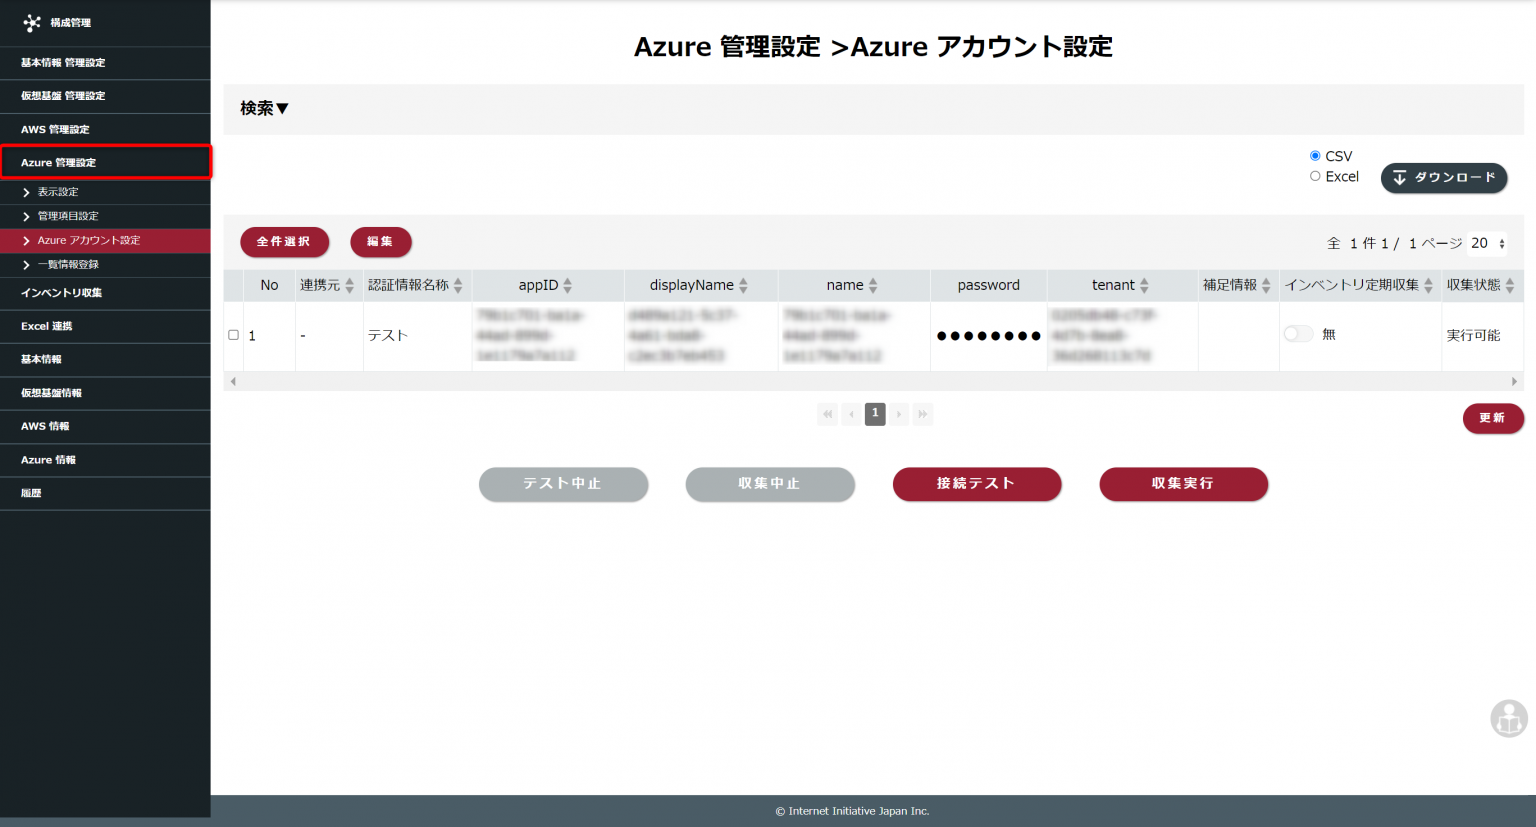
「編集」をクリックし、編集画面の「+新規」で追加する項目を入力していきます。
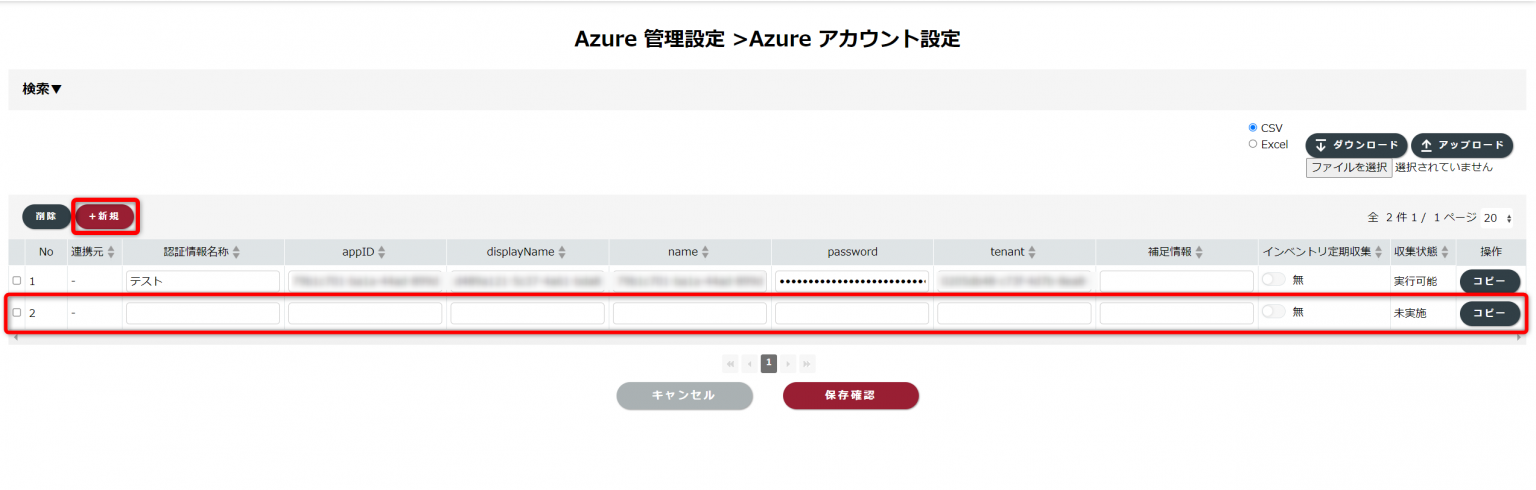
| 認証情報名称 | appID | displayName | name | password | tenant |
|---|---|---|---|---|---|
| 任意の名称を設定します | サービスプリンシパルで確認したappIDを入力します | displayNameを入力します | サービスプリンシパルで確認したappIDを入力します | サービスプリンシパルで確認したpasswordを入力します | サービスプリンシパルで確認したtenantを入力します |
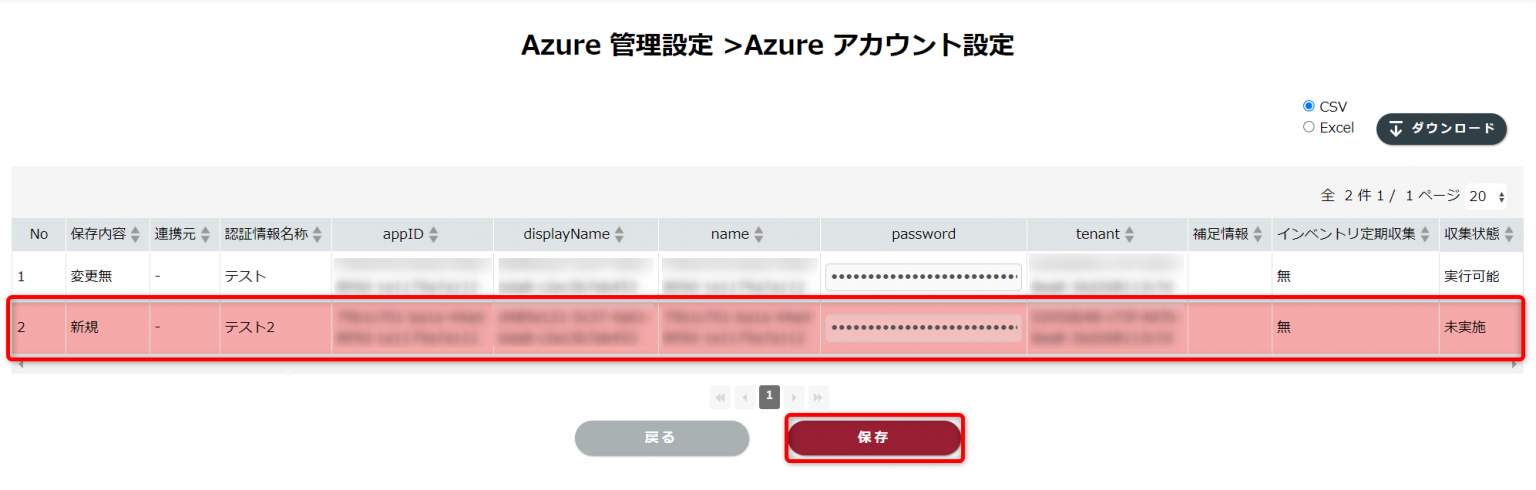
設定情報が入力できたら、「保存確認」をクリックし、内容に間違いがなければ「保存」をクリックします。
保存できたら、早速接続テストを実施してみましょう。新規追加したアカウント設定にチェックを入れ、「接続テスト」をクリックします。
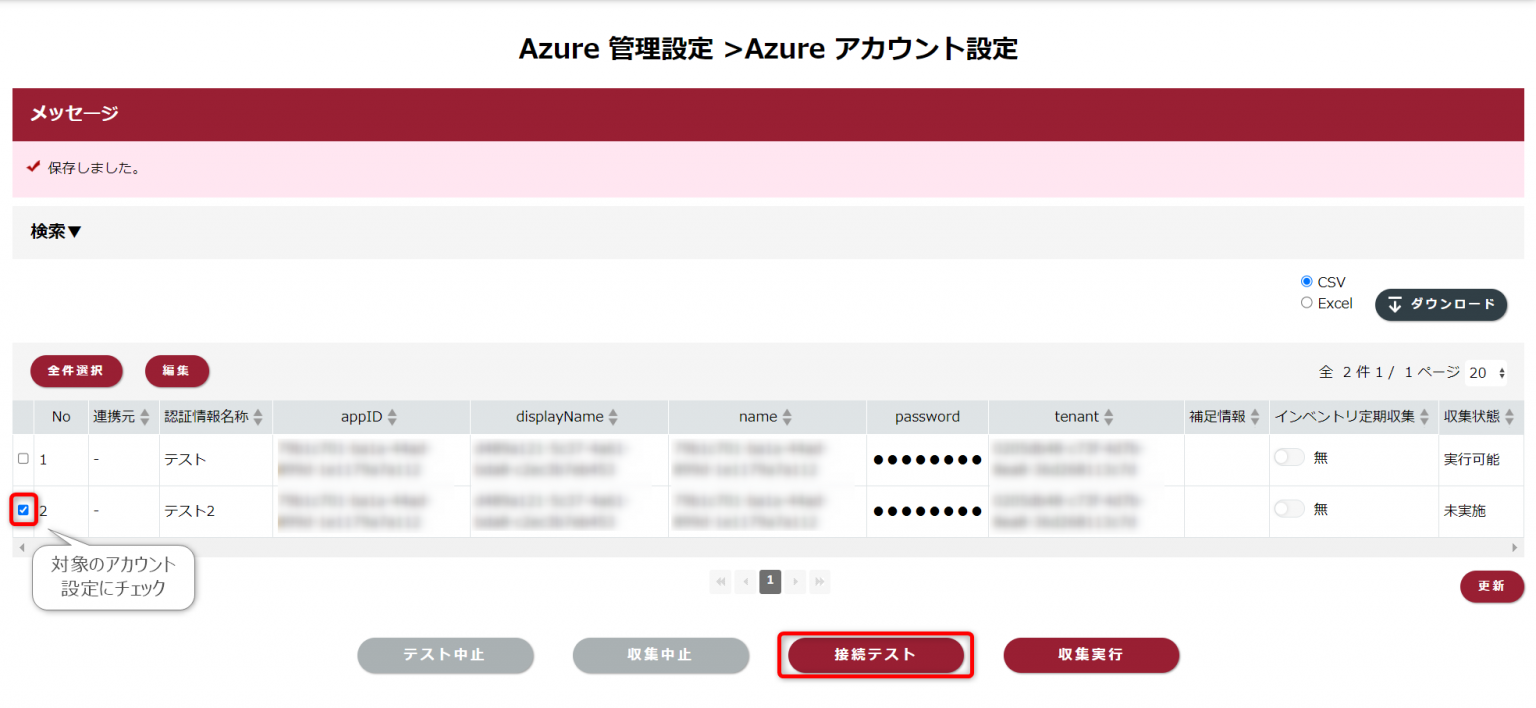
収集状態が「テスト実行中」に変わりますが、しばらくして「更新」をクリックすると、テストが成功していれば収集状態が「実行可能」に変わります。

これでアカウント登録が完了しました!「収集実行」もしくは定期インベントリ収集で取得した情報は、「Azure情報」から確認できますよ。
最後に
今回はインターネット経由でのAzureインベントリ収集方法を紹介してみました。プライベート接続の設定なしで気軽に利用できる機能となっていますので、ぜひお試しください。更に詳細なノード情報やソフトウェア情報が取得したい場合にはプライベート接続が必要になりますが、今後の脆弱性対応や資産管理をしっかりと実施したい場合にはそちらもおすすめです。
IIJ サービスプロダクト推進本部 営業推進部 クラウドソリューション課


サービスについてのお問い合わせは